How to Choose the Right Reamer Tool in 2026?
Choosing a Reamer Tool in 2026 is less about buying the newest catalog model and more about matching the tool to the hole, material, and machine. A reamer can improve diameter accuracy and surface finish, but it cannot reliably rescue a crooked, undersized, or poorly prepared bore. Small details matter. Check the workpiece material, target tolerance, hole depth, coolant access, and setup rigidity. A long through-hole in stainless steel may need different geometry and chip control than a shallow hole in aluminum. Even a sharp tool can chatter when runout, feed, or alignment is wrong.
Manufacturing expert Dr. David Dornfeld has written about the importance of process control. A practical paraphrase of that perspective is: “Control the setup before judging the tool.” This guide applies that idea to reamer selection, comparing hand and machine reamers, straight and spiral flutes, carbide and high-speed steel, and common tolerance considerations. It also explains when a standard size may work and when a custom option deserves a closer look. Feel the difference. In practice, a test cut can reveal what a specification sheet cannot. That is not always convenient, and tool choice alone will not fix every process problem. The aim is a repeatable decision, grounded in the material, machine, and finished-hole requirement.
Understand the Reamer’s Purpose and How It Removes Material
How to Choose the Right Reamer Tool in 2026?
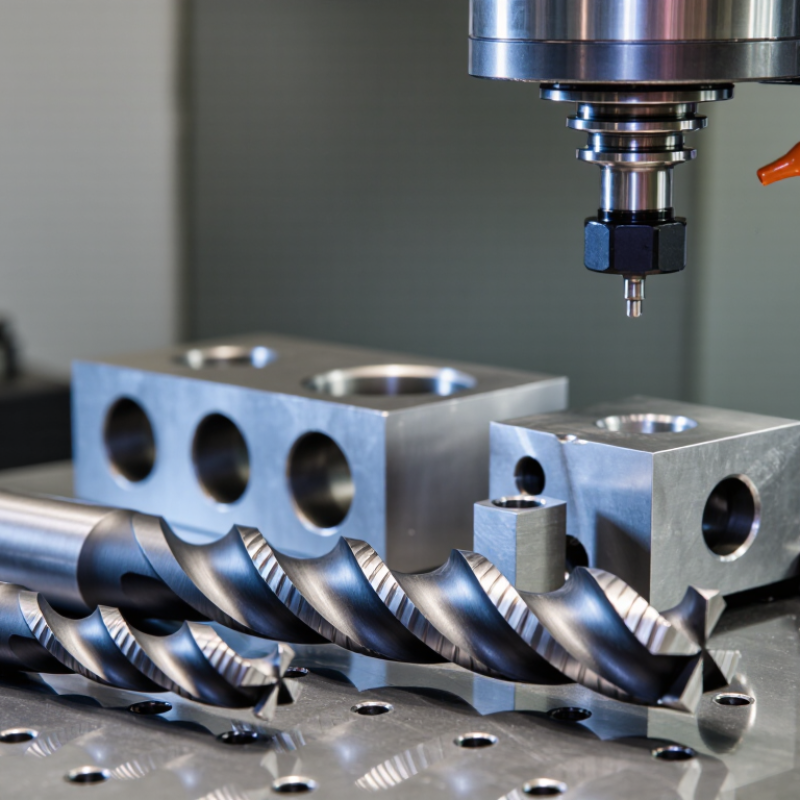
A reamer brings a pre-drilled hole closer to its target diameter and improves its surface finish. It is a finishing tool, not a substitute for a drill. Its cutting edges remove a thin layer from the hole wall as the tool turns. Small cuts matter. The existing hole should be slightly undersized, clean, and reasonably straight before reaming begins.
Choosing a reamer starts with the hole’s material, size, and required fit. A hand reamer suits controlled manual work, while a machine reamer is designed for use in a stable spindle setup. Check the tool’s diameter and cutting geometry against the material. Steel, aluminum, and other materials can respond differently, so suitable speed and lubrication matter. Clear chips often; packed chips can score the finished surface.
A practical check is to measure the hole before and after reaming with an appropriate gauge. Do not expect a reamer to correct a badly misplaced or oversized hole. It may follow existing misalignment. That distinction matters. It is tempting to increase pressure when progress feels slow, but forcing the tool can damage its edges or the workpiece. In practice, setup and a properly prepared hole can matter as much as the reamer itself. A careful test cut is sensible, especially when the fit is critical.
Identify the Workpiece Material and Required Hole Finish
The workpiece material should guide the reamer’s cutting edge and flute design. Aluminum can smear or build up on the cutting edge, so a sharp tool and effective chip clearance help maintain a clean bore. Tough stainless steels often generate heat and long chips; choose a suitable tool material and use stable cutting conditions. Cast iron is abrasive and produces fine chips, which can wear edges quickly. Check the material grade, not just its broad category. Two steels can behave differently.
The required hole finish also changes the choice. A reamer follows an existing hole; it is not meant to correct major misalignment or remove heavy stock. That matters. Leave a small, consistent allowance based on the material, tool, and process guidance. Too little may leave the drilled surface untouched, while too much can cause heat, chatter, or a rough finish. Check the drawing for the specified diameter and surface-finish requirement, then consider how the hole will be measured. Runout, tool rigidity, and chip evacuation all affect the result. Coolant can help, but its value depends on the material and setup. Keep it modest. A short trial cut and a measured sample are often more useful than assuming a familiar setting will work perfectly.
Compare Reamer Types, Flute Designs, and Cutting Materials
Choosing a reamer starts with the hole, not the tool catalog.
A hand reamer suits small, controlled adjustments; a machine reamer offers steadier alignment in a drill press or machining center. Neither can correct a badly misplaced hole. Leave a modest, consistent amount of material for the cutting edges to remove. Too much can cause chatter; too little may leave the finish unchanged.
Flute design affects chip flow.
Straight flutes are a practical option for many through-holes and interrupted cuts. Spiral flutes can improve chip evacuation in blind holes, though the helix direction matters: it determines whether chips are drawn back or pushed ahead. Check the hole depth, material, and exit conditions before choosing. This part is easy to overlook.
Cutting material should match the workpiece and setup.
High-speed steel is often suitable for general-purpose work and lower production volumes. Cobalt grades can offer better heat resistance in tougher materials. Carbide can support higher cutting speeds, but it is less forgiving of vibration or poor alignment. A rigid setup matters. So does lubrication.
If a finished hole measures oversize, do not blame the reamer alone; runout, built-up edge, and uneven stock can all contribute. The right choice is sometimes less obvious than a simple material chart suggests.
Select the Reamer Size, Tolerance, and Shank
Choose the reamer size from the finished-hole requirement, not just the drill bit marked on the setup sheet. Measure the drilled hole with a suitable gauge; drill size and actual hole size can differ. A reamer removes a small amount of material and improves size and finish, but it will not reliably straighten a badly misplaced hole. Keep the allowance within the tool maker’s guidance. Don’t guess.
Set the tolerance from the part drawing and how the hole will function. A locating pin may need a closer fit than a clearance hole, while an unnecessarily tight tolerance can add cost and scrap risk. Check the specified measurement method, too; temperature and burrs can affect readings. In shop practice, this step is easy to rush, especially when a hole looks clean. Looks are not a measurement.
Match the shank to the machine’s holder: straight shanks suit compatible chucks or collets, while taper shanks need the correct spindle or socket. Confirm the diameter, shank type, reach, and available clearance before loading the tool. Keep runout low and support the work firmly, since poor alignment can spoil an otherwise well-chosen size. Fit matters. If the setup is unusual, verify the tool’s operating guidance before cutting.
How to Choose the Right Reamer Tool in 2026
Select the reamer size, tolerance, and shank based on the hole specification and your setup.
ISO 286 tolerance widths increase with nominal diameter. These IT grades describe tolerance zones, not a guaranteed reaming result; actual hole size depends on the material, tool condition, and machining setup. Choose a reamer for the specified finished-hole limits and verify the result with suitable measuring equipment.
Verify Machine Compatibility, Cutting Conditions, and Tool Life
Choosing a reamer starts with the machine, not the hole alone. Confirm the spindle interface, available speed, feed range, and holder runout. A rigid setup matters: even a small alignment error can leave a bell-mouthed or oversized bore. Check the drawing’s tolerance and surface-finish requirement before selecting the reamer’s diameter and geometry. Then match the shank and overall length to the holder and fixture. A long tool may reach the feature, but it can also flex. Measure runout near the cutting edge, not only at the spindle. Small checks matter.
Cutting conditions decide whether the tool works predictably. Match speed and feed to the workpiece material, hardness, hole depth, and coolant delivery; chips trapped in a blind hole can score the finished bore. Deloitte and MAPI’s 2023 Smart Manufacturing Survey reported that 86% of respondents expected smart manufacturing to drive competitiveness within five years. That figure is not reamer-specific, but it highlights the value of monitoring process data. Track bore size, surface finish, and cycles between tool changes. Replace or inspect the reamer when measurements drift, rather than relying on a fixed schedule. I still double-check coolant flow at the cutting edge; a displayed setting does not prove the tool is receiving it. Tool-life estimates are useful, but actual wear can vary with setup and material batch.
How to Choose the Right Reamer Tool in 2026? - Verify Machine Compatibility, Cutting Conditions, and Tool Life
Use the values below as general starting points, not fixed limits. Actual settings depend on reamer geometry, workpiece condition, coolant, hole depth, machine rigidity, and the tool maker’s recommendations.
| Workpiece material |
Typical reamer choice |
Starting cutting speed |
Starting feed rate |
Practical notes |
| Low-carbon and general-purpose steel |
HSS for flexible, lower-volume work; carbide for rigid setups and higher production |
HSS: 5–15 m/min
Carbide: 20–60 m/min |
Use the diameter-based guide below; maintain a steady feed through the cut |
Use suitable cutting fluid where appropriate. Avoid dwelling in the hole, which can cause rubbing and oversize holes. |
| Stainless steel |
Sharp HSS or carbide reamer with geometry intended for stainless materials |
HSS: 3–8 m/min
Carbide: 10–30 m/min |
Use a consistent feed; do not pause while the cutting edges are engaged |
Stainless can work-harden. Use a rigid setup, effective lubrication, and a suitable pre-bored hole. |
| Gray cast iron |
HSS for moderate conditions; carbide is often suitable for abrasive, higher-volume work |
HSS: 8–20 m/min
Carbide: 30–80 m/min |
Select by reamer diameter and machine capability; ensure chips can clear the hole |
Many cast-iron operations are run dry; manage dust and check whether the material or process requires coolant. |
| Aluminum alloys |
Sharp HSS or carbide reamer with geometry suited to non-ferrous metals |
HSS: 10–30 m/min
Carbide: 40–150 m/min |
Use a continuous feed and prevent chips from packing in the flutes |
Use an appropriate lubricant when needed to reduce built-up edge. Check chip evacuation, especially in deep holes. |
Machine Compatibility and Tool Selection
| Reamer type |
Suitable machine or setup |
Best suited to |
Compatibility checks |
| Straight-flute chucking reamer |
Drill press, milling machine, or machining center with a suitable holder |
General through-hole and blind-hole finishing where chip load is manageable |
Check runout, spindle alignment, holder grip, and that the shank matches the holder. |
| Spiral-flute chucking reamer |
Rigid machine setup with controlled feed and adequate chip space |
Blind holes or applications where spiral flutes help move chips away from the cutting area |
Confirm flute direction and chip-flow suitability for the hole type and material. |
| Floating or adjustable reamer holder |
Machine setups with slight alignment variation, when the holder is designed for reaming |
Helping the reamer follow an existing hole without forcing the spindle to correct minor misalignment |
A floating holder does not correct a badly positioned, bent, or substantially misaligned hole. |
| Machine reamer with taper shank |
Machine spindle or socket that matches the shank taper and provides secure support |
Larger tools and setups requiring a robust shank connection |
Verify taper type, seating condition, tool length, spindle speed range, and available clearance. |
Feed, Hole Allowance, and Tool-Life Checks
| Item |
General starting guidance |
How to use it |
| Feed per revolution by reamer diameter |
3–6 mm diameter: 0.05–0.15 mm/rev
6–10 mm diameter: 0.10–0.25 mm/rev
10–20 mm diameter: 0.15–0.40 mm/rev
20–30 mm diameter: 0.25–0.60 mm/rev
|
These broad ranges are starting references only. Follow the reamer’s specifications and the machine’s rigidity limits; do not use a feed so low that the tool rubs instead of cutting. |
| Pre-ream hole allowance |
Under 6 mm diameter: about 0.05–0.15 mm
6–12 mm diameter: about 0.10–0.25 mm
12–25 mm diameter: about 0.15–0.35 mm
|
Allowance is the difference between the prepared hole and finished hole diameter. Confirm the tool-specific recommendation; too little or too much stock can harm finish, size, or tool life. |
| Tool-life monitoring |
No universal service-life value; establish life from the actual material, setup, and quality requirement |
Inspect hole size and finish at regular intervals. Replace or recondition the tool when size drifts, finish worsens, cutting load rises, or chipping and wear are visible. |
| Machine and process verification |
Check spindle speed, feed control, holder runout, rigidity, coolant delivery, and hole depth |
A reamer follows the existing hole and is intended to size and finish it; it is not a substitute for correcting poor location, severe taper, or substantial misalignment. |
Cutting speeds are in metres per minute (m/min); feeds are in millimetres per revolution (mm/rev). Confirm final settings with the tool manufacturer’s data and verify the finished hole using the required inspection method.
 Skip to content






 English
 Russian
 German
 Spanish
 French
 Portuguese