How to Choose a Multi Adapter Wiper in 2026?
Choosing a wiper blade in 2026 is not just about finding one that looks right. The connector must match your vehicle, the blade must suit the windshield, and the rubber should clear water without leaving streaks. A Multi Adapterwiper can work across several arm styles, but “multi-fit” does not mean universal. Check the package details against your vehicle’s year, make, and model.
Start with the owner’s manual or a trusted fitment guide. Confirm the blade length for both sides; a few centimeters can affect coverage or cause the blades to touch. Then inspect the wiper arm connector. Hook, pin, and bayonet fittings are not interchangeable, even when adapters make them look similar. Keep the supplied parts organized during installation. A small plastic adapter can be easy to lose.
Look beyond compatibility. A firm frame, even rubber pressure, and a secure locking tab matter when rain hits at highway speed. If possible, compare warranty terms and replacement guidance from the manufacturer. Be cautious with claims such as “all-weather” unless the product details explain how the blade handles heat, frost, or heavy rain. Small details count.
There is no perfect choice for every car. Even a well-reviewed blade may chatter on a curved or worn windshield. That part is easy to overlook. This guide will help you compare fit, materials, installation, and value, while reminding you to verify compatibility before buying.
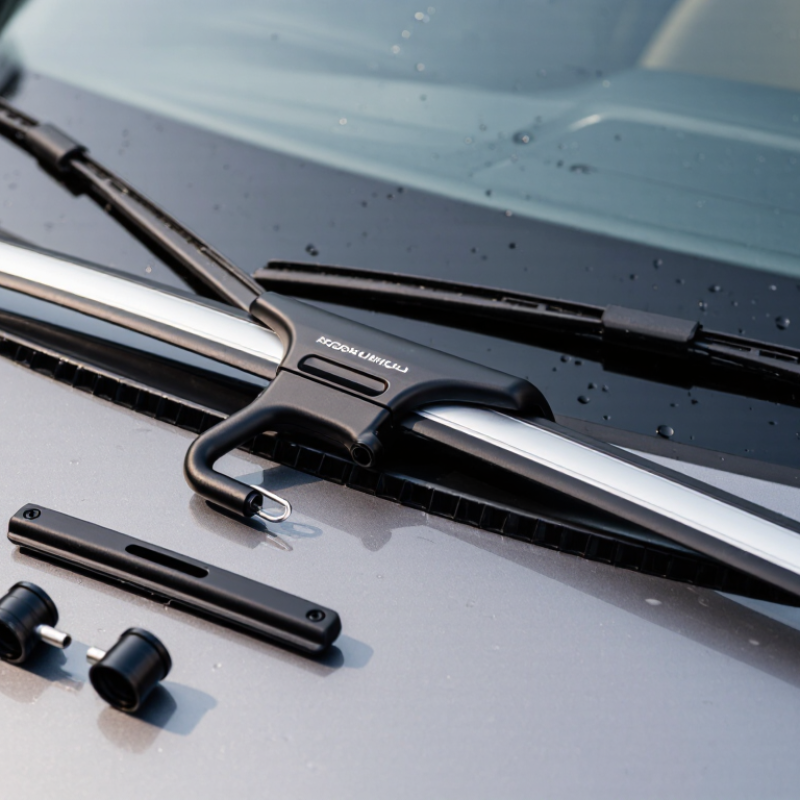
What a Multi-Adapter Wiper Is and How It Connects
How to Choose a Multi Adapter Wiper in 2026?
What a Multi-Adapter Wiper Is and How It Connects
A multi-adapter wiper includes interchangeable fittings designed to connect one blade to several windshield wiper arm styles. Common connections include J-hooks, pin arms, bayonet arms, and top-lock fittings. It does not mean every blade fits every vehicle. Check your vehicle’s manual or measure the existing blade before buying. The arm connection matters as much as blade length.
To install one, match the supplied adapter to the shape of your wiper arm. Slide or clip it into place as directed, then attach the blade until the lock engages. You should hear or feel a secure click. Give the blade a gentle tug before lowering the arm onto the glass. Don’t force a fitting that seems close; it may look right but still sit unevenly. I’ve found that small differences in connector shape can be easy to miss.
Tips: Work with the wiper arm lifted carefully, and place a folded towel on the windshield in case it slips. After installation, run the wipers with washer fluid and check for smooth movement, clear contact, and odd noises. Recheck the connection if the blade chatters or shifts. Adapters can be fiddly. A second look helps.
How to Choose a Multi Adapter Wiper in 2026? - What a Multi-Adapter Wiper Is and How It Connects
| Wiper-arm connection type | What the arm end looks like | How the blade connects | What to verify before choosing | Practical fit note |
| J-hook / U-hook | A curved hook-shaped arm end. | The hook slides through the blade connector and locks into place. | Check the hook profile and dimensions; hook sizes are not all interchangeable. | A widely used connection style, but confirm the adapter matches the specific hook. |
| Pinch tab | A relatively flat arm end with side tabs that can be pressed to release the blade. | The matching adapter engages the arm and its retaining tabs. | Compare tab position, arm width, and connector shape with the fitment information. | Similar-looking tab connections can have different dimensions or release details. |
| Side pin | An arm with a pin projecting from its side. | The pin passes through a corresponding opening in the blade adapter and is retained there. | Check the pin diameter, position, and the adapter’s opening and locking method. | Do not assume that every side-pin arm uses the same pin dimensions. |
| Bayonet | A relatively flat, tapered arm end that inserts into a connector. | The arm slides into the matching adapter and is secured by its retention feature. | Confirm the arm width, thickness, and retaining feature required by the adapter. | The connection name alone may not identify every size or design variation. |
| Top lock / push button | A flat arm end that inserts into the blade connector and uses a top-mounted locking feature. | The arm slides into the adapter until the button or latch engages; release it as directed for removal. | Check arm width, insertion direction, and the location and shape of the locking feature. | Top-lock designs vary, so confirm the exact connection shown in the vehicle or blade fitment guide. |
| Multi-adapter wiper | A blade supplied with a connector system that can be configured for more than one arm-interface type. | The installer selects and fits the adapter intended for the vehicle’s arm, following the blade’s instructions. | Check which adapters are included and whether the exact vehicle, model year, and wiper position are listed as compatible. | “Multi-adapter” does not mean universal; the correct adapter must match the arm. |
Before installation, compare the existing arm with the connector diagram in the fitment guide. After attaching the blade, check that the adapter is fully locked and that the blade moves freely without contacting the vehicle.
How to Identify Your Vehicle’s Wiper Arm Type
How to Choose a Multi Adapter Wiper in 2026?
How to Identify Your Vehicle’s Wiper Arm Type
Before choosing a multi-adapter wiper, identify the connector at the end of your wiper arm. Lift the arm gently and inspect the joint where the blade attaches. A curved hook usually indicates a J-hook arm. Other common designs include a straight bayonet, a side pin, and a top-lock or push-button fitting. Look closely.
Compare the connector with the diagrams in your vehicle’s owner’s manual or the wiper maker’s fitment guide. Check the arm’s width and any locking tabs, not just its general shape. Some fittings look nearly identical at a glance but need different adapters. Do not guess. Vehicle year and model are useful clues, but trim differences or replacement arms can change the connection.
If the old blade is still installed, note how it releases before removing it. Keep one hand on the metal arm; if it snaps against the windshield, it can cause damage. Match the new blade’s included adapter to the arm, then tug the connection lightly to confirm it locks. A small amount of play may be normal, but a loose or tilted fit is not. Recheck the guide if the parts do not sit squarely. It can feel fussy, and sometimes the first visual match is wrong. Better to pause than force the adapter.
How to Match Blade Length and Adapter Compatibility
Choosing a multi-adapter wiper in 2026 starts with the correct blade length, not the number of connectors in the box. Check your vehicle manual or a reliable fitment guide for each side. Driver and passenger blades can differ. Measure the old blade from end to end only as a cross-check; it may not be the original size. A blade that is too long can touch the frame or overlap its partner. Too short, and it leaves a visible strip of glass unwiped. Small differences matter.
Then match the adapter to the wiper arm. Common connections include hook, pin, and bayonet styles, but the names alone do not confirm a fit. Compare the arm’s shape with the adapter illustrations, and check that the selected piece locks securely without force. It should sit straight, with no wobble or exposed gap. Try a gentle pull before lowering the arm onto the windshield. The packaging can make several adapters look nearly identical; that part is easy to misread. If the connector remains unclear, pause and verify the vehicle’s arm type rather than guessing. After installation, run the wipers with washer fluid and inspect the full sweep for missed areas, chatter, or contact with the glass edge.
How to Compare Materials, Performance, and Weather Suitability
Choosing a multi-adapter wiper means checking more than the connector. Start with the vehicle’s specified blade length and attachment type. A box may list several adapters, but that does not guarantee a secure fit on every arm. Test the installed blade by gently checking the connection before driving. It should sit firmly, without rocking or catching.
Materials affect both wiping quality and service life. A flexible rubber edge can follow the curve of the glass, while a sturdy frame helps maintain even pressure. Look for smooth, consistent contact along the blade. Streaks near the center may signal poor pressure or a mismatched curve, not just worn rubber. Small details matter. A quieter wipe is useful, but silence alone does not prove good performance.
Match the blade to your usual weather. In heavy rain, even contact helps clear water quickly; in dusty conditions, a durable edge may wear more slowly. Cold mornings can stiffen some materials, while heat and direct sun can age exposed rubber. No blade handles every condition equally well. I would recheck the edge after a season, especially if it chatters or leaves narrow water trails. Fit can be imperfect, and real-world wear varies.
How to Choose a Multi-Adapter Wiper in 2026
Compare common blade materials by rain wiping, UV and ozone resistance, and cold-weather flexibility.
Ratings are an indicative comparison of typical material tendencies, not standardized test results. Formulation, blade design, and local conditions affect real-world performance. Multi-adapter fittings vary, so check your vehicle’s required connector and wiper size before buying.
How to Verify Fit, Installation, and Replacement Needs
How to Choose a Multi Adapter Wiper in 2026?
How to Verify Fit, Installation, and Replacement Needs
A multi adapter wiper can fit several arm styles, but that does not make every adapter suitable for your vehicle. Check the owner’s manual or a reliable fitment guide for the exact blade length and arm connection. Compare the connector with your existing wiper before buying. Small differences in hook shape or locking tabs matter. A snug fit matters.
During installation, park the wipers and switch off the ignition. Lift the arm carefully, placing a folded cloth on the windshield in case it slips. Attach the matching adapter until its lock engages, then tug gently to confirm it stays secure. Lower the arm slowly. Test the blade with washer fluid, and watch for uneven contact, skipping, or movement at the connector.
Tips: Keep the old blade nearby for comparison. If the adapter feels loose, stop and recheck the fit; forcing it may damage the connector. Listen closely.
Inspect the rubber regularly for splits, hard edges, or sections pulling away from the frame. Persistent streaks after cleaning the glass may signal wear, though dirt or poor installation can cause similar symptoms. Replace blades when wiping remains uneven, or when the rubber is visibly damaged. I would not rely on a fixed calendar alone: heat, cold, and frequent use change how quickly blades wear.
 Skip to content



 English
 Russian
 German
 Spanish
 French
 Portuguese