...

How to Prepare for a Motor Vehicle Inspection?

Preparing for a Motor Vehicle Inspection is more than cleaning the car and hoping for approval. It is a practical safety check. The goal is to identify small problems before they become expensive or dangerous.

Greg Brannon, AAA’s director of automotive engineering and industry relations, has said, “Regular maintenance is the best way to avoid unexpected repairs.” His advice reflects real inspection experience. A vehicle with worn tires, dim headlights, or a cracked windshield may fail despite having a strong engine.

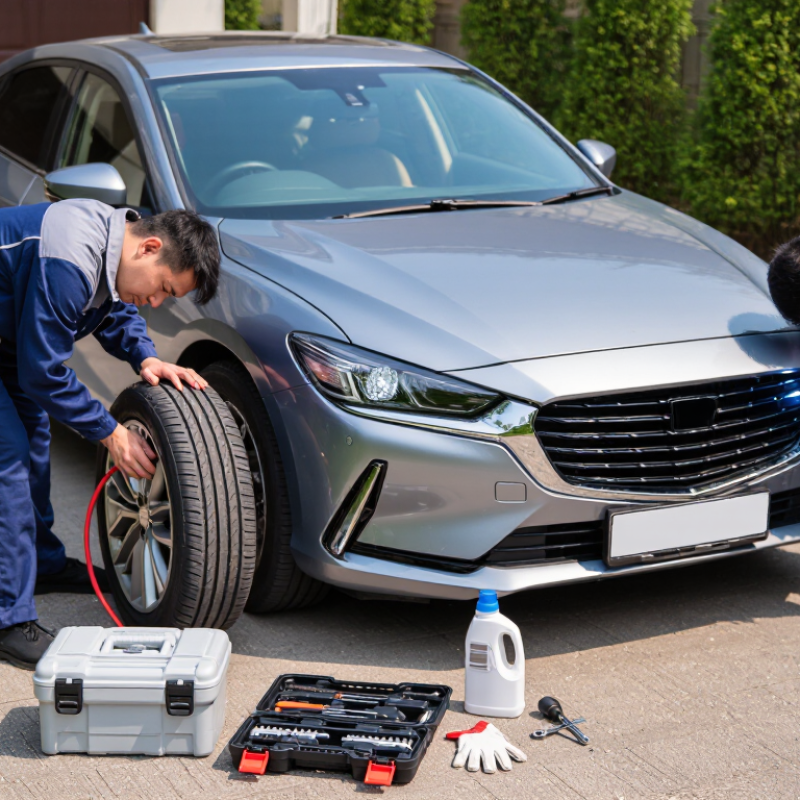
Start several days early. Check tire pressure when the tires are cold. Look for uneven tread wear, nails, or sidewall damage. Test every exterior light, including the license-plate lamp. Replace broken bulbs immediately. Inspect windshield wipers for splitting rubber. Spray the windshield and confirm that the washer system works.

Then examine the dashboard. Warning lights should not remain illuminated after the engine starts. Listen for unusual braking sounds. Notice pulling, vibration, or delayed stopping. Check fluid levels and look beneath the vehicle for fresh leaks.

Keep required documents nearby, such as registration, insurance, or repair records. Requirements differ by location, so verify them with the official inspection authority. Do not rely only on memory.

Small details matter.

A quick walk-around may reveal a loose fuel cap or damaged mirror. Still, visual checks cannot replace professional testing. That is where preparation can fall short. If the vehicle feels unsafe, ask a qualified technician to inspect it before the appointment. A clean report is useful, but dependable vehicle control matters more.
How to Prepare for a Motor Vehicle Inspection?

Review Required Documents, VIN Records, and Open Recalls Before Inspection

How to Prepare for a Motor Vehicle Inspection?

Before inspection day, gather your registration, insurance proof, and ownership documents. Requirements can differ by location, so check the official inspection authority’s current checklist. Bring the vehicle identification number (VIN) and compare it with the dashboard, door frame, and paperwork. Every number should match. Review the vehicle’s history for title issues, mileage changes, previous inspection results, and recorded repairs. I once found a minor VIN printing error on an old document, and correcting it took longer than expected.

Tips: Keep documents in one folder. Take clear photos of each page. Confirm the appointment details. Do not rely on memory.

Search for open safety recalls using an official government database or the vehicle manufacturer’s authorized records. Use the complete VIN, not only the model and year. An open recall may require documented repair before approval, depending on local rules. Ask the repair facility for a dated work order and keep it with your records. Also inspect basic items before arrival, including lights, tires, mirrors, seat belts, windshield condition, and warning indicators. These details are easy to overlook. A dashboard warning light can create an avoidable delay. If a document or repair record seems incomplete, contact the inspection office before driving there. That small call may prevent a second visit.


Inspect Tires at the 2/32-Inch (1.6 mm) Tread-Depth Safety Benchmark

How to Prepare for a Motor Vehicle Inspection?

Tire tread depth deserves careful attention before any motor vehicle inspection. The accepted safety benchmark is 2/32 inch, or 1.6 mm. The National Highway Traffic Safety Administration identifies this level as the minimum tread depth for replacement. The U.S. Tire Manufacturers Association also advises drivers to replace tires when tread reaches this point. Do not wait for visible damage.

Park on level ground and inspect each tire in bright daylight. Look across the main grooves, not only the outer shoulder. Wear bars should sit flush with the surrounding tread. That is a clear warning. Check for cuts, cracks, bulges, exposed cords, and uneven wear. Uneven tread may indicate alignment, suspension, or inflation problems. A professional tread-depth gauge gives a more reliable reading than a visual check.

I once relied on a coin test and assumed the tires were acceptable. That shortcut was easy to misread. Measure several points across every tire instead. The lowest reading matters most. Check pressure when the tires are cold, using the vehicle placard’s specification. The NHTSA Tire Safety guidance links proper inflation with safer handling and reduced tire stress. Record the measurements before inspection. A small notebook helps. If one tire measures near 2/32 inch, replacement planning should begin, even if the vehicle still feels normal.

Test Brakes, Lights, Wipers, Mirrors, Horn, and Seat Belts Systematically

How to Prepare for a Motor Vehicle Inspection?

Preparing for a motor vehicle inspection is easier when every safety system gets a deliberate check. I use a written walk-around sheet because memory can skip small faults. Park on level ground and inspect the brakes, lights, wipers, mirrors, horn, and seat belts. Press the brake pedal with the engine running. It should feel firm, not soft or sinking. In a safe, quiet area, brake gently and listen for scraping, pulling, or unusual vibration. Never ignore a warning light.

Tips: Ask another person to watch the exterior lights while you operate each switch. Check headlights, turn signals, brake lights, hazard lights, and the rear plate light. Replace damaged bulbs or cracked lenses before inspection. Clean the windshield and test the wipers with washer fluid. Streaks, skipping, or torn rubber can reduce visibility. Adjust both mirrors from the driver’s seat, then sound the horn briefly. It should work clearly without sticking.

Pull each seat belt slowly, buckle it, and tug firmly near the latch. The belt should lock during a sharp pull and retract without fraying. I once found a belt twisting behind the seat, an easy detail to miss. Check seat mounts and visible buckles for damage. Keep repair records and ask a qualified technician about uncertain defects. A home check is useful, but it cannot reveal hidden brake or restraint problems.

Check Fluid Levels, Leaks, and the 3-Millimeter Brake-Pad Service Threshold

Before a motor vehicle inspection, I check fluid levels on level ground with the engine cool. Low engine oil, coolant, brake fluid, or windshield washer fluid can reveal poor maintenance. I also inspect beneath the vehicle after it has been parked overnight. Fresh drops, oily stains, or a sharp chemical smell may indicate a leak. Clean the area, but never hide an active problem.

Brake pads deserve careful attention. A pad near the 3-millimeter service threshold has little usable material left, even if braking still feels normal. I measure the inner and outer pads because they can wear unevenly. A thin inner pad may signal a sticking caliper or another brake issue. That detail is easy to miss during a quick visual check.

I have learned to test lights, the horn, wipers, tire pressure, and seat belts before arriving. The tread should look even, without exposed cords, deep cuts, or bulges. Check the brake fluid level, but do not treat a full reservoir as proof of healthy brakes. Fluid can remain full while pads become dangerously thin. I once trusted a dashboard warning too much and overlooked uneven pad wear. That mistake changed my inspection routine. A qualified technician should measure brake components with proper tools, since the 3-millimeter threshold may vary by local inspection rules and vehicle requirements. Loose items in the cabin should also be secured. Small details matter.

Complete OBD-II Emissions Checks with All Readiness Monitors Set to Ready

How to Prepare for a Motor Vehicle Inspection?

Complete OBD-II Emissions Checks with All Readiness Monitors Set to Ready

An emissions inspection can fail even when the engine feels normal. The key is OBD-II readiness. These monitors check systems such as the catalyst, oxygen sensors, evaporative controls, and engine misfire detection. A diagnostic scan tool can show whether each monitor says “ready” or “not ready.” I once assumed a repaired warning light meant the vehicle was prepared. That assumption was wrong.

Disconnecting the battery usually clears stored information and resets readiness monitors. After repairs, the vehicle may need several complete drive cycles. Begin with a cold start and let the engine reach operating temperature. Include steady-speed driving, gentle acceleration, and controlled deceleration. Keep the fuel level within the range recommended for the vehicle. Avoid repeated short trips. They may not complete every test.

Check for active warning lights before scheduling the inspection. A professional technician can review pending codes and confirm monitor status. Do not erase codes simply to hide a problem. That can leave monitors incomplete and create another inspection failure. Requirements differ by location and vehicle age, so verify local inspection guidance. Keep the scan report and repair invoice. Small details matter.

How to Prepare for a Motor Vehicle Inspection? - Complete OBD-II Emissions Checks with All Readiness Monitors Set to Ready

Use this checklist to verify diagnostic trouble codes, emissions readiness monitors, vehicle conditions, and inspection-day requirements before an OBD-II emissions inspection.

Inspection Area What to Check Acceptable Condition Why It Matters Recommended Status
Diagnostic Trouble Codes Scan for stored, pending, and permanent emissions-related codes. No active emissions fault codes; do not erase codes immediately before inspection. A fault code can turn on the malfunction indicator lamp and may cause an automatic inspection failure under local rules. Clear / Verified
Malfunction Indicator Lamp Turn the ignition on without starting the engine, then start the vehicle. The warning lamp illuminates briefly during the bulb check and goes out after the engine starts. A lamp that remains on indicates a detected emissions or engine-management fault. Lamp Off
Continuous Monitors Check misfire, fuel-system, and comprehensive-component monitors. These monitors normally run continuously while the vehicle is operating and should report complete when no fault prevents testing. They evaluate core engine-control functions that can directly affect emissions. Ready
Catalyst Monitor Confirm that the catalytic-converter efficiency monitor has completed. Monitor shows Ready after the vehicle has experienced suitable operating conditions. The monitor compares oxygen-sensor behavior to assess catalyst performance. Ready
Oxygen Sensor Monitor Check the oxygen-sensor response and activity monitor. Monitor shows Ready with no related sensor fault code. Oxygen sensors help control the air-fuel mixture and support emissions testing. Ready
Oxygen Sensor Heater Monitor Verify that the oxygen-sensor heater monitor has completed. Monitor shows Ready and no heater-circuit fault is stored. The heater allows the sensor to reach operating temperature quickly, especially after a cold start. Ready
Evaporative System Monitor Check the fuel-vapor leak and purge-system monitor. Monitor shows Ready; fuel cap is properly installed and the fuel level is within the vehicle’s required test range. It detects fuel-vapor leaks that can increase hydrocarbon emissions. Ready
Exhaust Gas Recirculation / Variable Valve Timing Check whether the vehicle is equipped with an EGR or valve-timing monitor and verify its status. If supported, the monitor shows Ready with no related fault code. Some vehicles do not use this monitor. These systems can reduce combustion temperatures or optimize engine operation to control emissions. Ready if Equipped
Secondary Air Injection Check the secondary-air monitor when the vehicle is equipped with this system. If supported, the monitor shows Ready and the related pump, valve, and sensor circuits pass their checks. Additional air may be introduced during cold operation to help reduce emissions and warm the catalyst. Ready if Equipped
Heated Catalyst Check the heated-catalyst monitor if the vehicle supports it. If supported, the monitor shows Ready with no related fault code. The system is designed to bring the catalyst to effective operating temperature more quickly. Ready if Equipped
Readiness After Battery Disconnection Check whether the battery was disconnected, replaced, or allowed to go completely flat. All required monitors have completed again before inspection. Loss of power commonly resets readiness monitors to Not Ready and may also erase stored diagnostic information. Recheck Required
Drive-Cycle Completion Follow the vehicle manufacturer’s drive-cycle conditions, including cold starts, steady-speed driving, deceleration, and varied engine loads. Drive until every monitor required by the vehicle and local inspection program reports Ready. Different monitors require different temperatures, speeds, fuel levels, and operating conditions; one short trip may not complete them all. Confirm with Scanner
Warm-Up and Fuel Level Allow the engine to reach normal operating temperature and keep the fuel level within the vehicle’s specified range. Engine temperature is normal; fuel level is neither nearly empty nor overfilled. Temperature and fuel-level conditions can prevent catalyst or evaporative-system tests from running. Condition Met
Recent Repairs After repairs, scan again and confirm that no new codes or pending codes have appeared. Repair is verified, warning lamp remains off, and required monitors are Ready. A repaired vehicle can still fail if a monitor has not completed or if a fault is pending. Verify Before Test
Inspection-Day Preparation Bring required documents, arrive with the engine warmed up, and avoid clearing codes before the test. Vehicle identification and registration documents meet local requirements; scan data is unchanged and complete. Inspection procedures and the number of permitted Not Ready monitors vary by jurisdiction, vehicle age, and vehicle type. Ready to Inspect
en_USEnglish

PCD Inserts

PCBN Inserts

Solid CBN Inserts

PCD Milling Cutter

PCD Drilling Tools

PCD Reamer

Diamond Special Tool

Diamond Dressers