How to Use Double-Ended Dowel Pins for Stronger Joints?
Creating strong joints in woodworking requires attention to detail and the right materials. One effective solution is the use of the Double-Ended Dowel Pin. This versatile component allows for secure connections between two pieces of material. The way it functions is simple yet efficient.
When connecting wood, precision is essential. The Double-Ended Dowel Pin provides two ends for easy alignment. Professionals frequently recommend them for their strength and reliability. However, improper placement can weaken the joint. Remember that experience plays a crucial role when using dowel pins. There's a learning curve that can lead to mistakes, but these are opportunities for growth.
Application techniques must be refined. This process might not always yield perfect results initially. Ensure that holes are drilled accurately. The choice of adhesive also affects joint strength. The Double-Ended Dowel Pin can enhance structure if used correctly. Emphasizing care and technique will lead to stronger assemblies.
Understanding Double-Ended Dowel Pins and Their Applications
Double-ended dowel pins are versatile fasteners used for creating strong joints in woodworking and furniture assembly. These pins feature a smooth, cylindrical design with threads on both ends. This unique structure allows them to be inserted into pre-drilled holes in two separate pieces of wood, effectively joining them together. The key lies in their ability to transfer tensile and compressive forces across the joint, leading to enhanced structural strength.
In practical applications, double-ended dowel pins can be found in various projects, from cabinetry to tables. They provide a clean and hidden fastening solution compared to screws, which can be visually disruptive. However, achieving precise alignment during installation is crucial. Misalignment can weaken the joint, leading to potential failures. Proper drilling and measuring become essential skills when working with these pins.
Many woodworkers find their first attempts challenging. It often takes practice to master the technique. Mistakes during setup may result in loose joints or awkward assembly angles. Reflecting on these early experiences fosters improvement, making the process rewarding. With patience and practice, double-ended dowel pins can become valuable tools for creating lasting, sturdy joints.
Choosing the Right Size and Material for Dowel Pins
Choosing the right size and material for dowel pins is essential for creating strong joints in woodworking. When selecting dowel pins, consider the thickness of the materials you are joining. A pin should have a diameter roughly one-third of the thickness. If the dowel is too small, it may not provide enough support. Conversely, an oversized dowel can weaken the surrounding wood. Measurements matter greatly. Taking accurate measurements can make or break your project.
Material selection is equally important. Common materials for dowel pins include hardwood, softwood, and metal. Hardwood is ideal for strength and durability while softwood is lighter and easier to work with. Metal dowels can provide exceptional strength but may require special tools for installation. Each material behaves differently, affecting the joint's performance. Additionally, consider the moisture content of the wood. If the dowels and material are not compatible in moisture levels, you may encounter issues down the line.
Lastly, do not overlook the importance of fit. A dowel pin should slide into the hole without being forced. This ensures a snug but not overly tight joint. If the pin fits too loosely, it compromises stability. If it’s too tight, you risk splitting the wood. Experimentation may be necessary. Sometimes, what works in theory doesn’t translate perfectly in practice. Fine-tuning the fit can lead to better results.
Preparing Wood Surfaces for Optimal Dowel Joint Strength
Preparing wood surfaces properly is crucial for strong dowel joint strength. Begin by selecting the right wood. Softwoods often absorb moisture, leading to weaker joints. Hardwoods provide a more stable surface for dowels. Once selected, inspect the wood for any defects like knots or cracks that could compromise the joint.
Next, ensure the surfaces are flat and smooth. Use a jointer or hand plane to achieve this. Even a slight unevenness can lead to misalignment during assembly. Sand the surfaces with progressive grits, starting from coarse to fine. This process enhances adhesion and reduces the chance of air pockets, which can weaken the bond.
Another aspect to consider is moisture content. Ideally, wood should be at a stable humidity level. Wood that is too dry can crack, while overly moist wood can warp. Using a moisture meter can help gauge this. If the wood has been stored in less than ideal conditions, let it acclimate before assembly. Pay attention to these details, as they can make a significant difference in the strength of the final joint.
Proper Techniques for Drilling Holes for Dowel Pins
Drilling holes for double-ended dowel pins requires precision and care. Begin by selecting the right drill bit size. Using a bit that matches the diameter of the dowel is crucial. This ensures a snug fit, creating a stronger joint. Mark the locations clearly on the wood. Accurate placement helps avoid misalignment later.
Tips: Use a center punch to start your drilling. It prevents the drill bit from wandering. This simple step improves accuracy. Adjust your drill speed based on the material. Slower speeds work better for dense woods, reducing the chance of splintering.
Pay attention to the depth of your holes. They should be slightly deeper than the dowel length. This accounts for any glue and maintains a tight fit. It’s easy to overlook this detail. If you drill too shallow, the pins won't hold properly. Always check your work before moving on. Small adjustments can make a big difference.
How to Use Double-Ended Dowel Pins for Stronger Joints?
| Joint Type | Wood Type | Dowel Pin Size (mm) | Drilling Technique | Recommended Clamping Time (mins) |
| Butt Joint | Pine | 8 | Centered drilling with a depth stop | 30 |
| Lapped Joint | Oak | 10 | Drill both pieces for alignment | 40 |
| Mortise and Tenon | Maple | 12 | Mortise holes before assembling | 45 |
| Corner Joint | Birch | 8 | Drill from both sides for best fit | 25 |
Assembling the Joint: Tips for Using Double-Ended Dowel Pins
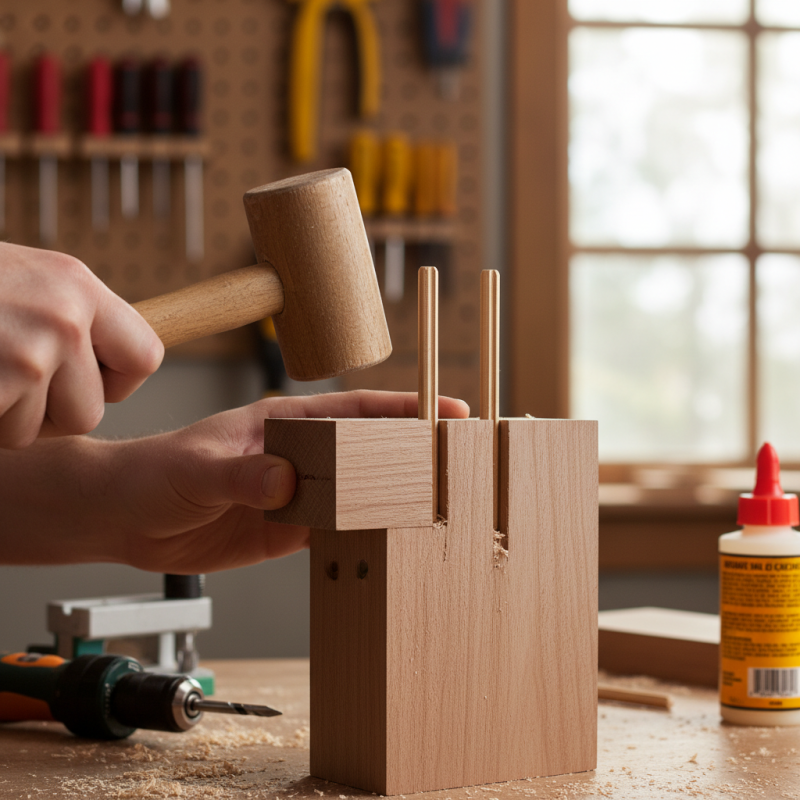
When assembling joints with double-ended dowel pins, precision is key. Start by marking the exact locations where the pins will go. Use a drill press to ensure that holes are perfectly aligned and of the correct depth. This step is critical because incorrectly placed holes can lead to weak joints. Even minor misalignments can compromise stability. Take your time measuring and drilling; rushing can lead to mistakes.
Once holes are prepared, apply a suitable wood glue inside the holes. Insert the dowel pins into one piece of wood first. Carefully align the second piece over the exposed dowels. It can be tricky to fit the two pieces together seamlessly. If they don’t align perfectly, it’s okay to adjust gently. Forcing the joints can cause damage. Always ensure that pressure is evenly distributed during assembly. Use clamps to hold everything in place as the glue dries.
Remember to inspect the final joint for any gaps or uneven surfaces. Filling gaps with wood filler can enhance the joint's appearance and strength. Not every assembly will be flawless on the first attempt, and that's part of the learning process. Reflecting on what went right or wrong will improve your skills in the long run. Embrace these moments—they are opportunities for growth.
 Skip to content