SUNDI TOOLS
- Copyright © Wuxi Sundi Precision Tools Co.,LTD All rights reserved.
- Site Map
Custom Golf Hat Clips are compact accessories that attach to a golf cap’s brim and keep a ball marker close at hand. Many designs use a small metal clip and a magnetic marker, though materials and attachment styles vary. The idea is simple: reach for the marker without searching a pocket or golf bag. Small detail. Less rummaging.
The National Golf Foundation’s 2024 report on 2023 participation estimated that 26.6 million Americans played golf on a course. That figure describes participation, not accessory sales, but it shows the scale of the playing community these products serve. For golfers, a clip may offer convenience; for clubs, tournament organizers, and brands, customization can add names, logos, colors, or event dates. A polished logo matters, yet the marker still needs to detach easily and stay secure during a round.
What makes a useful Custom Golf Hat Clip? Fit, magnet strength, finish, and everyday comfort all deserve attention. A heavy clip can pull at a lightweight cap, while a weak magnet may let the marker slip. These are practical trade-offs, not just design details. Personalization also has limits: a detailed graphic can look appealing on screen but become hard to read at a small size. This guide explains how golf hat clips work, what customization options are common, and what to check before choosing one. Small, but worth considering.
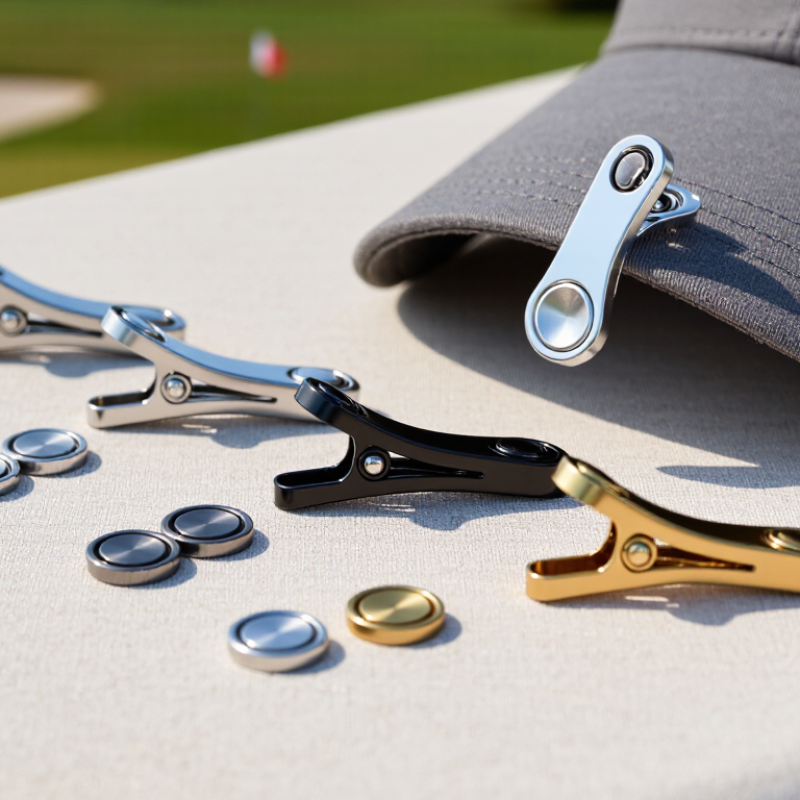
A custom golf hat clip is a small accessory that fastens to a cap brim and holds a removable ball marker. It keeps the marker close when a golfer reaches the green, rather than loose in a pocket. The clip usually has a curved or spring-tension body that grips fabric without requiring a hole in the hat. Fit matters: a clip that is too tight may crease a soft brim, while a loose one can shift during a round.
The main components are the clip, a magnetic holder, and the marker itself. The clip may be made from plated metal or stainless steel, with smooth edges to reduce snagging. A small magnet secures the marker but allows it to lift off with a fingertip.
Simple enough. The marker carries the visible custom design, such as engraved initials, a colored emblem, or a short piece of text. Some designs add a polished or matte finish, which changes how the surface looks in sunlight and how easily fingerprints show.
Details vary between makers, so magnet strength, marker size, and brim compatibility are worth checking before ordering. A tiny accessory can be less convenient than expected if its marker is hard to remove with cold fingers.
A custom golf hat clip is a small metal holder that attaches to a cap brim or another convenient spot. Its magnet keeps a ball marker close, so you can reach it without searching a pocket. Simple, but useful. The marker usually lifts off with a quick pull and snaps back into place after you mark your ball.
During a round, that easy reach matters most on the green. You can remove the marker with one hand while holding your putter or glove in the other. A secure clip also helps prevent the marker from slipping out as you walk between holes. Fit varies, though. Check that the clip grips your cap firmly and that the magnet holds your marker through ordinary movement.
Custom details can make the clip easier to recognize among small accessories, but appearance is only part of the choice. Look for smooth edges that will not snag fabric, and consider how the clip feels on your hat. A heavier design may tug on a thin brim. It is easy to overlook that. Test the setup before a full round, and adjust its position if it catches on your hair or feels unbalanced.
Custom golf hat clips are small accessories that attach to a cap brim and keep a removable ball marker close at hand. Their purpose is convenience, not ball measurement or rule compliance.
The USGA Equipment Rules, Part 3, set two key ball limits: a conforming ball must measure at least 1.680 inches in diameter and weigh no more than 1.620 ounces. That is about 42.67 millimeters and 45.93 grams. The dimensions matter. A ball that falls below the minimum diameter or exceeds the maximum weight does not meet these specifications.
For golfers, these figures give custom clip makers a useful design reference: markers should be easy to remove without crowding the brim or catching on a glove. A magnetic marker can sit flat against the clip; a raised edge may be easier to grasp, though it can snag. Small details count. The clip itself does not make a golf ball conform to USGA standards, and it should not be confused with a measuring tool. I have found that a marker that feels secure in the shop can loosen after repeated cap handling. Not every design works equally well. The USGA specifications are precise, but comfort and retention still need real-world testing.
A custom golf hat clip is a small magnetic fitting that holds a removable ball marker on a cap or visor. Its design affects more than appearance. The clip should sit securely without pulling fabric or feeling bulky. Common materials include stainless steel, brass, and lightweight alloys. Stainless steel offers a firm feel and resists everyday wear, while brass can bring a warmer tone. Lightweight options may suit thin caps, but overly thin metal can feel less substantial. Small details matter.
Finishes change both the look and upkeep. Brushed metal can soften fingerprints and minor marks; a polished surface catches the light but may show scratches sooner. Matte coatings create a quieter appearance, though their durability depends on the coating and how the clip is handled. Logos can be engraved, stamped, or printed. Engraving gives a crisp, lasting impression, while printed color allows more detail but may wear with frequent rubbing. Keep artwork simple. Tiny lettering can become difficult to read on a compact clip.
Marker shapes range from circles and squares to custom outlines. A round marker is easy to spot and remove, while unusual shapes can make a set feel personal. Still, intricate edges may catch in a pocket or be harder to grip with cold fingers. Check that the marker sits flat against the clip and releases smoothly. A handsome design is not always the easiest one to use; that trade-off is worth considering before choosing materials, finish, logo, and shape.
Customization Choices: Clip Materials, Finishes, Logos, and Marker Shapes
Material density affects the potential weight of a clip: aluminum is much lighter than stainless steel, zinc alloy, or brass. Values shown are approximate representative densities; exact values vary by alloy. Custom designs can also specify finishes such as polished or matte, add a logo, and choose marker shapes such as round, square, or rectangular.
A custom golf hat clip should sit securely on the brim without pinching it or blocking your view. Match the clip’s opening to your hat’s thickness; a curved, padded brim may need a wider grip than a flat cap. Check that the marker lifts easily with one hand, but stays put when you bend or walk. Too weak, and it may drop in a cart. Too strong, and removal becomes fiddly. Small detail. Big difference. The National Golf Foundation’s 2024 report counted 28.1 million on-course golfers in the United States in 2023, a reminder that these accessories face frequent use outdoors.
Magnet strength has no universal golf-clip rating, so test the actual pair before buying. Hold the cap upside down, give it a gentle shake, then remove the marker with damp fingers. Repeat after dust or sunscreen gets near the contact surfaces. For durability, inspect the clip’s edges, hinge, and coating; rough seams can snag fabric, while a loose hinge may gradually lose its grip. ASTM International’s D4966 method measures textile abrasion resistance, but it does not certify a hat clip. That distinction matters. A simple home test is useful, though it cannot predict years of wear. Wipe the clip dry after rain, and avoid bending it to fit a brim. I would check the fit again after several rounds. Some clips loosen sooner than expected.
| What to Check | Practical Guidance | Why It Matters | Care or Use Tip |
|---|---|---|---|
| Clip fit | Check that the clip opens wide enough for the cap’s brim and grips it without crushing, stretching, or visibly marking the fabric. | Brims vary in thickness, stiffness, and construction, so a clip that fits one hat may not fit another. | Test it on a less visible section of the brim and avoid forcing the clip onto thick or reinforced edges. |
| Contact area | Look for smooth, rounded edges and a contact surface that sits securely against the brim. | A well-fitted surface is less likely to snag fabric or shift during movement. | Remove the clip by opening it rather than pulling it sideways across the material. |
| Magnet strength | Choose a magnet that holds a ball marker securely but still allows the marker to be removed by hand. There is no single strength rating that suits every clip design. | Magnet performance depends on the magnet, marker material, contact area, and distance between them. | Check that the marker stays attached when the hat is gently tilted or moved. Keep magnets away from devices or cards that may be affected by magnetic fields. |
| Marker compatibility | Use a marker designed to work with the clip’s magnetic surface; some decorative or non-magnetic markers may not attach reliably. | A strong clip magnet cannot hold a marker that does not respond to it. | Test the marker before play and carry a spare in a pocket or golf bag. |
| Material and finish | Consider the clip body, spring or hinge, and any coating. Smooth, corrosion-resistant materials are generally better suited to regular outdoor use. | Sweat, moisture, sunscreen, and repeated handling can affect finishes and moving parts over time. | After exposure to moisture, wipe the clip dry and allow it to air-dry before storing it. |
| Retention during play | Before a round, check that the clip remains in place while walking and that the marker stays attached during ordinary movement. | A clip that shifts or drops its marker can be inconvenient on the course. | Reposition it on a stable part of the brim if it slides, and avoid attaching it to loose or damaged fabric. |
| Cleaning | Use a soft, slightly damp cloth to remove dirt or sweat. Follow the care instructions supplied with the clip. | Abrasive cleaners and rough scrubbing may scratch the surface or wear away a coating. | Do not soak a clip with a magnet or moving parts unless its care instructions specifically allow it. |
| Storage and inspection | Store the clip somewhere dry and check the grip, hinge, and magnet periodically for looseness, corrosion, or damage. | Regular inspection can help identify wear before the clip or marker is lost. | Remove the clip from the hat when it is not in use, especially before washing or storing the cap. |
Fit and holding performance vary by clip, hat, and marker. Treat the guidance above as a practical checklist and follow the product’s care instructions.