Aller au contenu
Mèches de toupie à coupe ascendante ou à coupe descendante : Choisir la bonne pour les projets en bois
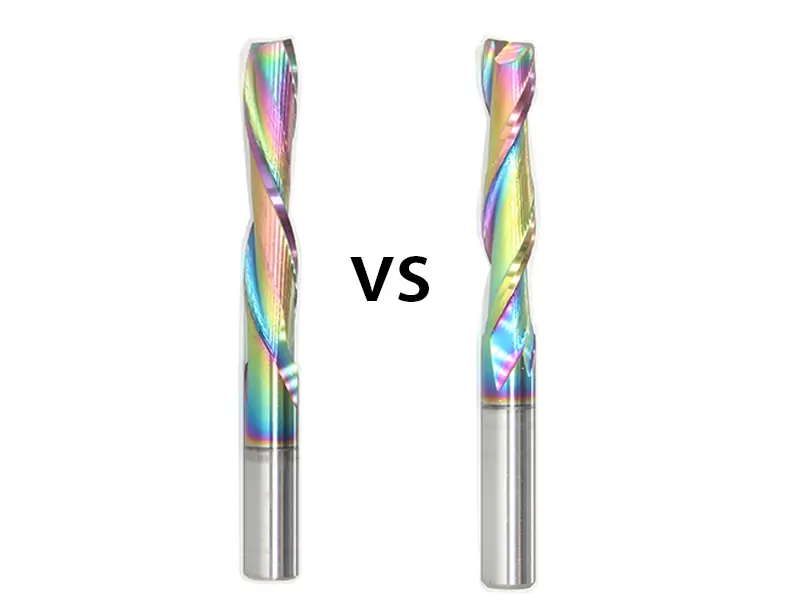
In woodworking, choosing the right router bit is very important for the quality of the cut and the efficiency of the work, and it can be difficult to pick the right tool for your job when there are so many options in woodworking. Here’s a question our Sundi engineers hear weekly: “What’s the real difference between up-cut and down-cut router bits?” Due to the difference in the direction of the cutting edge, the upcut router bit and the downcut router bit are each designed for a specific application to achieve different cutting results. Therefore we have written this article explaining the difference between up-cut and down-cut router bit to help you choose the right woodworking tool for you to get the perfect finish.
Contenu
The Differences Between Up Cut and Down Cut Router Bits
Up Cut Spirals router bits
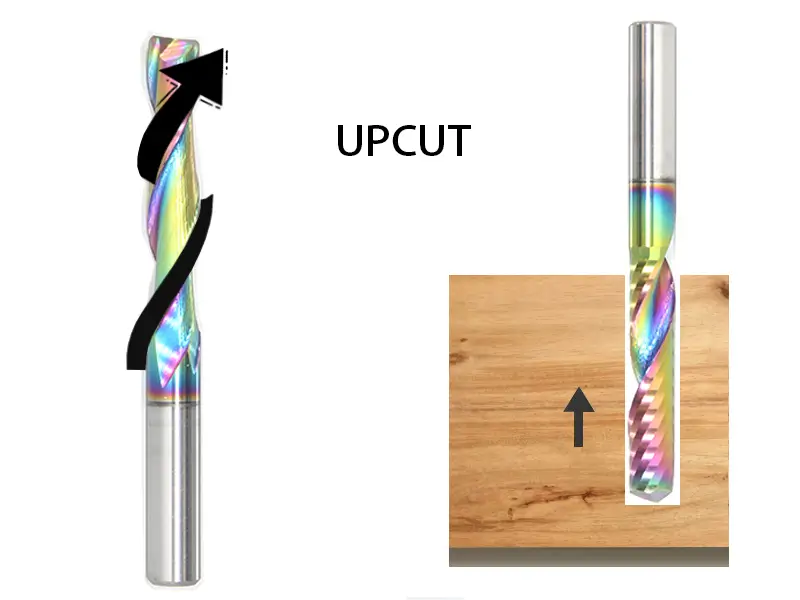
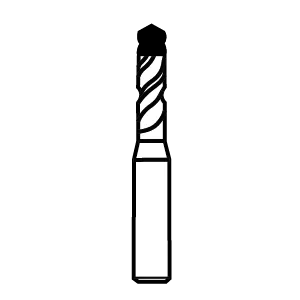
When examining an up-cut spiral router bit, you’ll notice its cutting edges angle upward from left to right – similar to a twist drill’s design. During operation, the spiral action pulls material upward, ejecting wood chips through the top. This upward chip evacuation prevents debris buildup in the cutting zone, which helps avoid two common issues: heat accumulation and scorch marks. More importantly, it keeps the workpiece’s underside clean and splinter-free, making these bits ideal for precision tasks like mortise-and-tenon joinery or deep groove cutting.
However, that same upward pull has a trade-off. The lifting force can raise surface fibers along the cut’s top edge, leading to tear-out on your workpiece’s face. This becomes particularly noticeable when working with thin materials or laminated stock, where the upward pressure might even cause splitting or warping.
Down Cut Spirals router bits
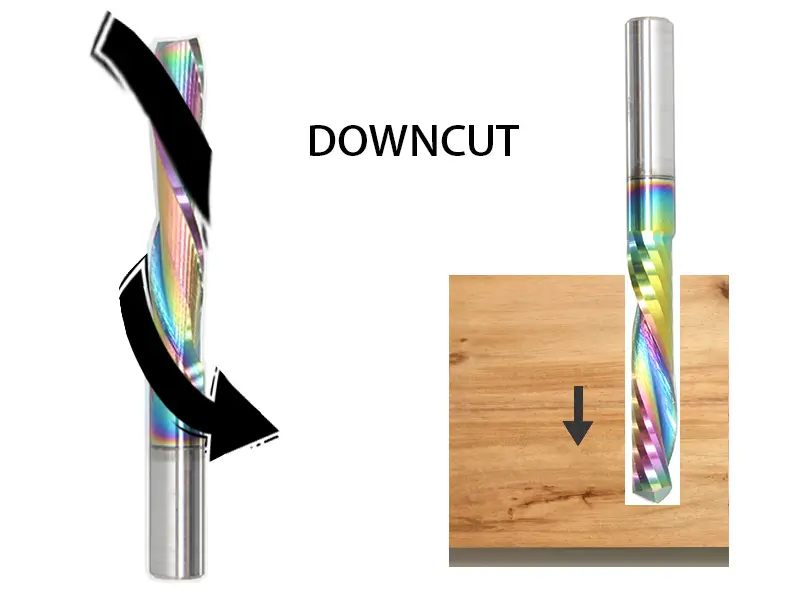
In contrast to up-cut router bits, down-cut spiral bits feature cutting edges that angle downward from left to right. During operation, the spiral flutes force chips downward into the workpiece. This downward compression creates glass-smooth top surfaces without tear-out, making them perfect for finish-critical projects like veneer work or laminated board polishing.
But there’s a catch: Unlike up-cut spirals, down-cut bits demand slower feed rates. The downward pressure traps chips in the cutting groove, requiring frequent pauses to clear debris. If chips accumulate excessively, they’ll clog the bit – a scenario that risks overheating and premature baseplate wear. This fundamental limitation makes them poorly suited for deep-cut applications.
Key Differences
Reading this, I believe you have a clear understanding of upcut and downcut router bits, then we list the differences between them in detail:
Chip Removal
The most obvious difference lies in blade orientation. Up-cut bits angle upward left-to-right, ejecting chips through the top. Down-cut versions spiral downward left-to-right, compressing debris into the workpiece.
Material Handling
Up-cut bits dominate general woodworking – ideal for solid wood, acrylics, and PVC. Down-cut variants shine with layered materials like plywood, MDF, and veneers where surface finish trumps speed.
Operation Scenarios
Reach for up-cut bits when creating deep mortises or roughing grooves – their aggressive chip clearance powers through dense materials. Down-cut bits excel at delicate tasks: edge-trimming veneers, shallow engraving, or polishing pre-laminated surfaces.
Tool Longevity
Here’s the trade-off: Down-cut bits’ chip-trapping design causes faster wear. Up-cut bits’ superior debris ejection keeps edges sharper longer, making them the workhorse for heavy-duty jobs.
Which bit is right for your project?
The choice of up or down cut router bits depends on the needs of your project.
Si vous avez besoin d'une coupe profonde ou d'un bord inférieur net, choisissez les mèches de défonceuse à coupe ascendante, si vous devez faire des rainures, des encoches et des dadoes peu profonds et que vous avez besoin d'une surface supérieure nette, ou si vous travaillez avec du placage ou du bois fin susceptible de se déformer, choisissez les mèches de défonceuse à coupe descendante. Si vous avez besoin d'un bord net sur les bords inférieur et supérieur, c'est là que je recommande l'utilisation des mèches de toupie à coupe descendante. Compression Router Bit.
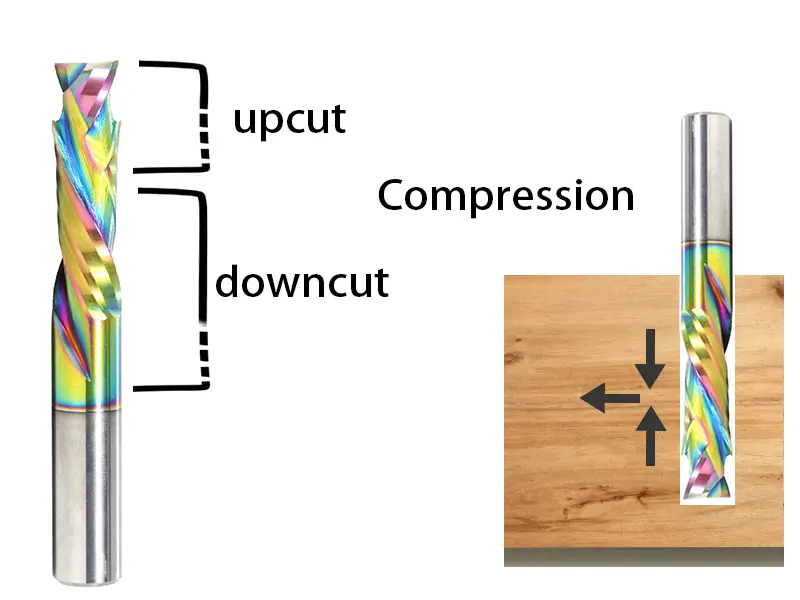
La mèche de toupie à compression est une combinaison de tranchants ascendants et descendants, avec le tranchant descendant près de la tige et le tranchant ascendant près du sommet de la mèche de toupie, qui tire les copeaux vers le centre plutôt que vers l'extérieur, où ils sont projetés par la partie supérieure de la mèche et ramassés par la partie inférieure. Les copeaux sont projetés vers le bas par la partie supérieure de la tête et ramassés par la partie inférieure, d'où le nom de « compression ». Avec la fraise à compression, le matériau composite est pressé ensemble pendant le processus de coupe, ce qui empêche la délamination et maintient les bords inférieurs et supérieurs nets, ce qui la rend idéale pour le contreplaqué stratifié ou les panneaux d'armoire, mais pas pour les coupes très superficielles. Bien entendu, la fraise à compression est un peu plus chère et nécessite des compétences spécialisées, mais si vous disposez d'un budget limité et que vous savez comment l'utiliser correctement, la fraise à compression est la solution idéale.
Nous espérons que cette partie de l'article vous fournira quelques suggestions de référence. N'oubliez pas de consulter notre gamme complète de mèches de toupie pour la menuiserie afin de vous assurer que vous disposez de l'outil adéquat pour votre travail.