SUNDI TOOLS
- Copyright © Wuxi Sundi Precision Tools Co.,LTD All rights reserved.
- Site Map
Accurate cuts rarely come from a sharp edge alone. The right tool must suit the material, the cut, and the person holding it. Precision Cutting Tools range from fine craft knives and rotary cutters to shears, flush cutters, and small saws. Each has a different feel in the hand. A blade that glides through paper may snag fabric or leave a rough edge on thin plastic.
This guide looks at seven useful options and the jobs they handle well. It compares control, cutting capacity, blade replacement, durability, and practical safety features. Small details matter: a textured grip can steady a cut, while a loose hinge can spoil it. So can rushing. Even a well-made tool may perform poorly when matched to the wrong material. That sounds obvious. It is easy to overlook.
There is no single best choice for every workshop, craft table, or repair task. A hobbyist trimming paper needs different control than someone cutting layered fabric or soft sheet material. The recommendations should therefore be read as a starting point, not a universal ranking. Check the manufacturer’s guidance for compatible materials and maintenance, and test unfamiliar tools on scrap when possible. A cleaner cut is useful. A safer, more predictable one matters more.
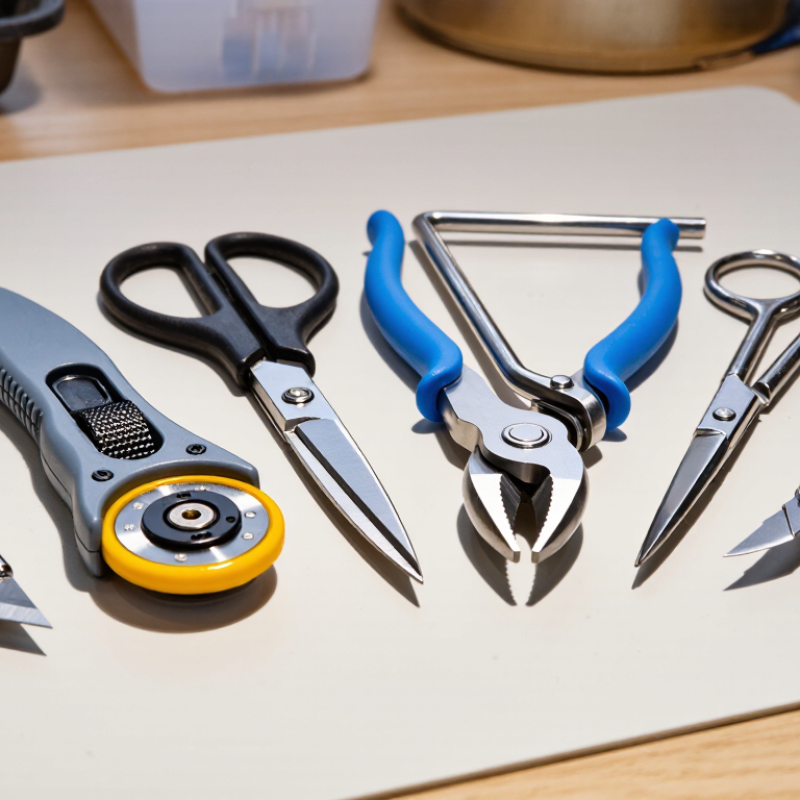
Precision cutting tools do more than make a clean-looking edge. Their blade geometry, stiffness, and movement help control where force meets the material. A sharp, fine blade can slice thin film with little distortion, while supported shears apply leverage to sheet material. Small details matter.
A rotary cutter rolls through fabric or paper, keeping a steady line when paired with a firm guide. A craft knife offers tighter control around corners, but its exposed blade can wander if the grip or cutting surface is unstable. For repeated straight cuts, a guided cutter or small guillotine can improve consistency. Each tool has limits. Thick material may bend a delicate blade, and excessive pressure can leave ragged edges rather than cleaner ones.
What sets these tools apart is not sharpness alone. Blade alignment, handle comfort, material support, and the operator’s technique all affect accuracy. Before cutting, check that the workpiece lies flat and the blade has no visible nicks. Use a test piece when the material is unfamiliar. It can feel fussy, but it often reveals whether the tool is suited to the job. Even a precise tool may produce uneven results when the surface shifts or the cutting angle changes.
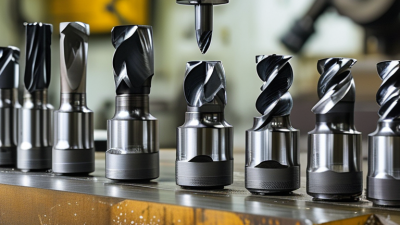
Choosing a precision cutting tool starts with the material and the cut, not the catalogue photograph. Match edge geometry and tool material to the workpiece; a brittle edge may chip on interrupted cuts, while a tougher edge can wear faster in continuous, high-speed work. Check runout, rigidity, and clamping compatibility, too. Even a sharp tool can leave a poor finish if it vibrates or sits off-centre. Fit matters.
Grand View Research estimates the global cutting-tools market was worth USD 23.5 billion in 2023, reflecting the scale of demand for reliable machining. Market size alone, however, cannot tell you which tool will hold tolerance on your part. Compare measured dimensions, burrs, and edge wear across a short test run. Small test cuts reveal more than a spec sheet.
Also consider chip evacuation, heat resistance, visibility at the cutting edge, and how easily an operator can make safe adjustments. A 2024 Deloitte and Manufacturing Institute study projects that 1.9 million U.S. manufacturing jobs could remain unfilled by 2033, underscoring the value of clear setup and repeatable processes. I would not treat any feature list as a guarantee: real workpiece variation can upset a neat trial. Choose a tool you can inspect and measure in your actual setup.
What Are the 7 Best Precision Cutting Tools?
Seven Precision Cutting Tools and Their Core Uses
The right cutting tool depends on the material and the detail required. A craft knife handles paper, thin card, and intricate shapes; guide its blade along a metal ruler for straighter lines. A utility knife suits thicker cardboard and packaging, where a sturdier blade helps maintain control. A scalpel-style knife makes fine cuts in delicate paper or model materials. Keep the work on a cutting mat. Small slips happen.
For fabric, a rotary cutter creates smooth, long cuts with less lifting than scissors. Use it with a ruler, and keep fingers clear of the blade’s path. Precision scissors are useful for trimming curves, loose threads, and small fabric pieces. They are less effective on long, perfectly straight cuts. That distinction matters.
Flush cutters trim small plastic ties, model parts, or soft wire close to a surface. They are not meant for hardened metal. A fine-tooth hobby saw cuts small pieces of wood or plastic when a knife would require too much force. Match the blade to the material, and test on a scrap when possible. I still sometimes choose a tool by habit, then have to redo the edge. A slower first cut can be cleaner.
A qualitative guide to how closely each tool matches its typical precision-cutting task.
The 1–5 ratings are qualitative, not laboratory measurements. Scalpels suit fine incisions and trimming; craft knives handle paper and card; rotary cutters are designed for fabric; precision scissors trim fabric and paper; flush cutters remove small plastic parts and soft wire; jeweler’s saws cut thin metal; and glass cutters score glass for breaking along a line.
A utility knife handles cardboard, foam board, and straight cuts in thin plastic; its rigid blade suits a ruler-guided pass. A craft knife offers finer control for paper models and intricate shapes, though its narrow blade can wander if pushed too hard. A rotary cutter glides through fabric and several paper layers, especially along curves. Keep a cutting mat underneath. Scissors work well for paper, fabric, and light packaging, but can distort delicate material near tight corners. For thicker fabric or thin sheet material, shears provide leverage and a longer cutting edge.
A precision scalpel can make tiny, controlled cuts in paper, film, or soft material, but demands a steady hand and frequent blade checks. A fine-tooth precision saw is better for small wooden pieces and some plastics, where knives may crush or split the edge. Use eye protection when sawing, and secure the work rather than holding it close to the blade. No tool suits every task. In practice, a blade that feels precise on paper may snag fabric, and the “clean” result can still need sanding or trimming. Test on a scrap first; I sometimes skip that step, and usually regret it.
What Are the 7 Best Precision Cutting Tools?
How to Select, Use, and Maintain a Precision Cutting Tool
Choosing a precision cutting tool starts with the material, not the tool’s appearance. A craft knife suits paper and thin card, while fine scissors work well for fabric and flexible films. For repeated cuts, consider blade stability, grip comfort, and whether replacement blades are easy to find. A tool that feels precise in a shop may become tiring during a long session. That matters.
Before cutting, secure the material on a suitable cutting mat and mark the line clearly. Use light, steady pressure rather than forcing the blade through in one stroke. Keep fingers away from the cutting path, and turn the material when that gives you better control. On a curved edge, slower movements often produce a cleaner result. Practice on a scrap piece first; it can reveal small handling problems.
After use, wipe the tool clean and check the blade for chips, residue, or looseness. A dull edge can snag material, so replace it when cuts begin to drag. Store sharp tools with a cover, away from children and loose supplies. I sometimes overlook the handle, but a cracked or slippery grip deserves attention too. Maintenance is simple, though easy to postpone.
| Tool | Best For | Suitable Materials | How to Select | Use Tips | Maintenance and Safety |
|---|---|---|---|---|---|
| Precision Craft Knife | Fine trimming, scoring, stencil work, and detailed straight or curved cuts | Paper, card, thin craft foam, and some thin sheet materials | Choose a comfortable handle with a secure blade-locking mechanism and blades suited to the material and cut shape. | Work on a cutting mat, keep the blade sharp, and make several light passes rather than forcing one deep cut. | Retract or cover the blade when not in use. Replace dull or damaged blades carefully and dispose of them in a sharps container. |
| Scalpel-Style Hobby Knife | Very small details, intricate curves, and model-making cuts | Paper, thin plastic, film, and lightweight model materials | Select a handle that holds the blade firmly and a blade profile that matches the task; check compatibility before buying replacement blades. | Use a stable work surface and guide the blade away from fingers. For curves, rotate the workpiece when practical instead of twisting the blade. | Keep blades clean and dry, inspect the holder for looseness, and change blades when cutting becomes difficult or uneven. |
| Rotary Cutter | Long, smooth cuts through layered flexible materials | Fabric, felt, paper, and thin flexible sheet materials | Choose a blade diameter suited to the curve and material thickness, along with a handle that feels secure in the hand. | Use a cutting mat and a ruler designed to protect fingers. Roll the cutter steadily; do not pull it toward the body. | Retract the blade after every cut. Replace a nicked blade and keep the cutting mat clean so debris does not affect the cut. |
| Precision Scissors | Controlled freehand cutting where a blade and cutting mat are inconvenient | Paper, thread, fabric, thin film, and lightweight craft materials | Look for fine, aligned tips, smooth movement, and a handle size that allows comfortable control. | Use the tip for small details and the middle of the blades for longer cuts. Avoid materials that exceed the scissors' intended capacity. | Wipe the blades clean and dry after use. Keep the pivot secure and have blunt or misaligned blades serviced or replaced. |
| Flush Cutters | Snipping small leads, ties, and protruding plastic parts close to a surface | Soft wire within the tool's rating, cable ties, and small plastic components | Check the manufacturer's stated cutting capacity and select a jaw shape that provides access without obstructing the work. | Cut only materials within the tool's rating. Keep the cut-off piece controlled, as small pieces can spring away. | Do not use on hardened steel or other materials beyond the rating. Clean the jaws, keep the pivot moving freely, and protect the cutting edges. |
| Jeweler's Saw | Detailed interior and exterior cuts in small workpieces | Thin non-ferrous sheet metal, plastic, and other materials matched to the blade type | Choose a rigid frame with adequate throat depth and a blade size appropriate to the material thickness and detail. | Fit the blade with its teeth facing the cutting direction, tension it correctly, and use light, even strokes while securing the workpiece. | Wear eye protection and keep fingers clear of the blade path. Replace broken or worn blades and store the saw without stressing the frame. |
| Precision Side Cutters | Cutting small components and leads where a controlled angled cut is useful | Soft wire and small electronic leads within the tool's specified capacity | Select a jaw profile and cutting capacity suited to the work; insulated handles alone do not establish electrical safety. | Keep the workpiece close to the cutting joint for better control, and support the piece being removed to prevent it from flying. | Never cut live electrical conductors unless the tool and work procedure are specifically rated for that purpose. Clean and inspect the jaws regularly. |